Exposure Triangle Explained: Mastering Your Camera Has Never Been Easier
One of the things that most beginners or even some amateur photographers struggle to understand is setting the correct exposure. It’s quite simply the amount of light that you want in your photos, and cameras have three ways to help you make sure your photos are correctly exposed.
And therefore, you may have heard about the term Exposure Triangle thrown around as the ultimate solution to perfectly lit photos, but what exactly is it, and how can you master it? Well, it’s simpler than you think.
The Problem With Letting Your Camera Decide
Historically, technology has been extremely efficient at making things easier for us, and our cameras are no different.
Out of the box, the dials on your camera are probably flipped to Auto mode, which pretty much allows the camera to adjust the settings depending on what it thinks is best to help capture images.
In fact, I’d recommend shooting in Auto to get a feel for the new camera. However, if you’ve been using Program Auto for a few weeks, things have to change.
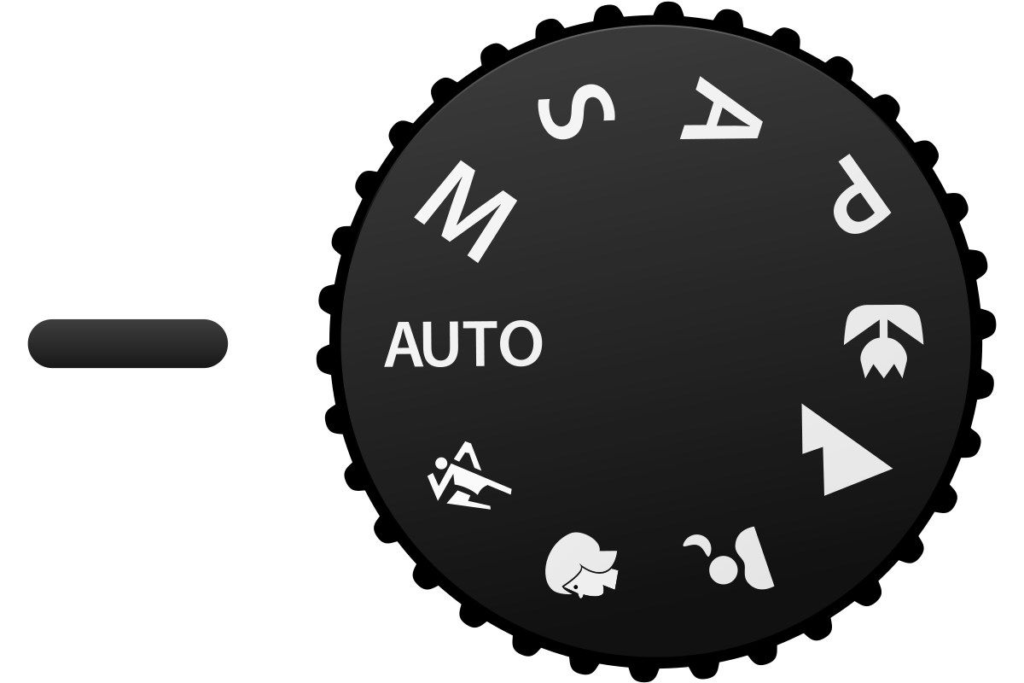
The problem with letting your camera decide doesn’t lie in its inherently bad kinds of decisions. It all boils down to the creativity. It limits the camera’s full capabilities and holds you back from being creative with the settings.
In my experience, photos shot in Auto tend to come out flat and lacking character. Manual mode changes that. It breaks the shackles and lets you get creative with your shots. However, to explore the creativity angle, understanding the exposure triangle is extremely important.
Understanding the Exposure Triangle
I want you to let go of the complex-sounding “Exposure Triangle” term first and drill these three words in your mind exactly in the sequence I’m writing them in. They are:
- Aperture: The opening in your camera. Controls how much light enters your camera and the bokeh.
- Shutter Speed: The speed of the physical shutter in your camera.
- ISO: Your camera sensor’s sensitivity to light. More ISO = Brighter images, but also more noise.
Now, if you don’t know what these are, it’s okay. For the sake of this write-up, I’ve written their brief definitions to give you a surface-level idea of what they do.
We’ll be delving much deeper into them once some of our other pages go live.
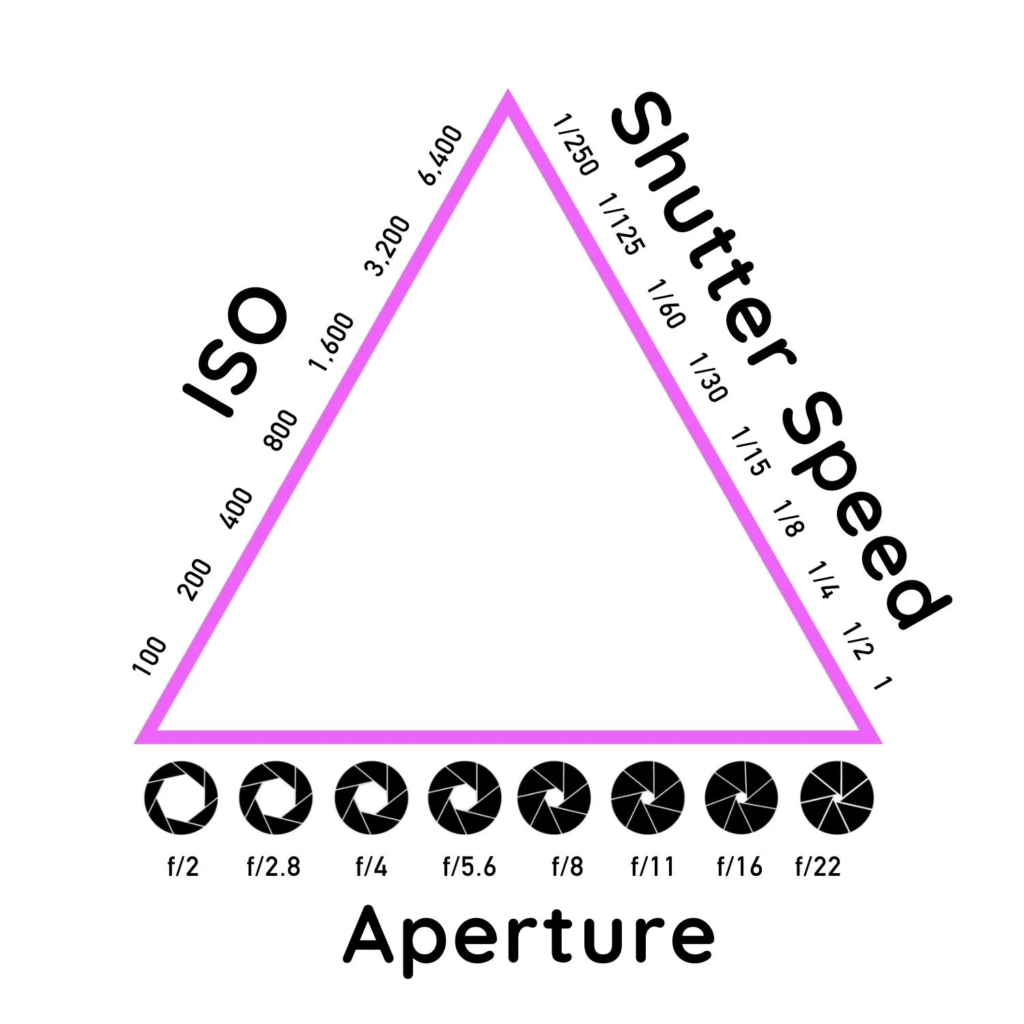
It’s worth noting that these settings can only be adjusted independently when you’re shooting in full manual mode. Modes like Aperture Priority and Shutter Priority still hand one variable over to the camera, so you’re only ever half in control. Therefore, it’s highly recommended to master full manual mode if you want to take your photos to the next level.
A quick note before we go further: the order below (aperture → shutter → ISO) is the sequence I’ve found most intuitive for beginners — not the only correct way to think about exposure.
Plenty of photographers lock shutter speed first based on subject motion, then adjust aperture, then let ISO float. Use whichever order builds intuition fastest for you.
The Aperture Dilemma
The key to exposing your photos properly is to start with Aperture. The value depends on the kind of lens you have and can range from as low as f/1.2 all the way to f/22.
It’s the opening in the lens that controls the amount of light entering the camera, and it also controls the amount of bokeh (the blurriness) you get in the images.
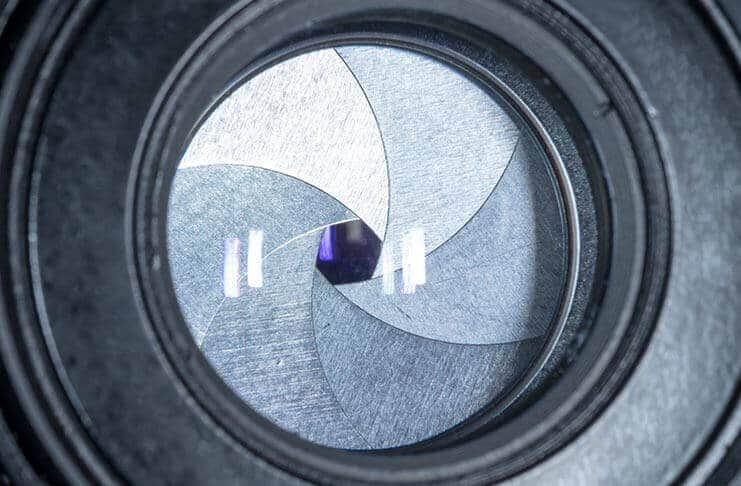
The smaller the number, the bigger the opening and the more light enters the camera. The bigger the number, the smaller the opening and the less light enters the camera.
So, the obvious solution to get well-exposed images is to have the number as low as possible, right?
Not really.
You see, having your aperture set to f/1.2 or f/1.4 does help more light enter, but it’s far from ideal because you don’t want all your images to have a very deep and shallow bokeh. You might want to take a picture that has more elements in focus or just let go of some of the bokeh for creative purposes.
Here are some of the examples and the right aperture values for the same:
- A group portrait would ideally need an aperture ranging from f/4 to f/5.6 to get more people in focus while also maintaining a slight bokeh to separate the foreground from the background.
- A landscape or a street photo would require anywhere between f/8 and f/13 to ensure everything is in focus.
- A standard portrait of a person would require you to set the aperture anywhere between f/1.4 and f/4 (ideally f/2.8) to retain that shallow depth of field.
Therefore, one of the first things to do when exposing an image is to start by adjusting the aperture, but keeping it open just enough so that it fits the context of the image. And then we move on to the shutter speed.
Shutter Speed Mechanics
A shutter in a camera controls the amount of time the light hits the sensor. It’s usually measured in 1/xxxx of a second. The consensus is simple — the faster the shutter speed, the lower the amount of light entering the sensor. So, it’s better to have the shutter speed as low as possible, right?
Wrong.
While shutter speed is responsible for brighter images, it also plays an important part in freezing objects. A higher shutter speed can freeze objects in time and make them appear tack-sharp, but that also means that you should have plenty of light when shooting, or your image would be underexposed.
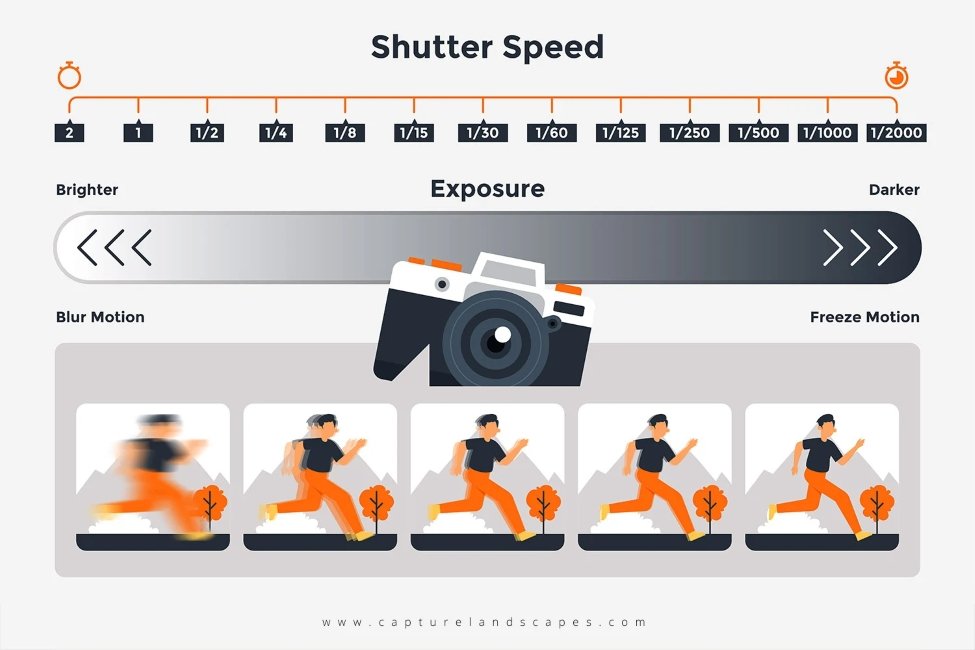
A slower shutter speed, while it helps bump up the exposure, can make things blurry, especially if you’re shooting fast-moving objects or subjects that aren’t very stable, including your hands.
Slower shutter speeds cannot compensate for the micro jitters from your hands when shooting pictures, so your photos are bound to appear blurry. To better understand how shutter speed works, here are a few examples.
- Shooting subjects: Stick to 1/125 or 1/60 (if your camera or lens has built-in stabilisation).
- Shooting fast-moving objects: 1/1000 to 1/4000. Have your shutter close as fast as possible to freeze objects in motion.
Don’t Be Afraid of Bumping Your ISO
One of the things that scared me as a beginner photographer was ISO. With the stigma that lower ISO produces better-looking images, more than half of my photos would come out underexposed or blurry in challenging lighting conditions. However, the truth is, ISO isn’t as scary as people claim it is.
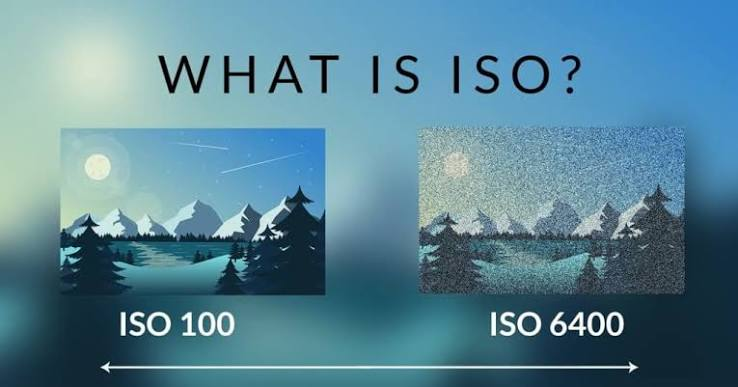
Imagine this: you’re shooting in challenging lighting conditions. You set the aperture and shutter speed, but the image preview is still pretty dark. Now you’ve got two options:
- Lower your shutter speed, which is going to introduce motion blur.
- Or increase your ISO, which is going to introduce noise in your images but will help keep it well exposed.
This is where most people make the wrong choice of lowering the shutter speed over bumping the ISO. Noise can be fixed in post, but blurry pictures cannot be recovered later. ISO should be treated as your best friend, not an enemy.
As a rough guide: most modern APS-C sensors handle up to ISO 3200 very comfortably, with usable results even higher depending on your camera’s noise processing.
Full-frame sensors like the ones in the Sony A7C or similar cameras can often push past ISO 6400 before noise becomes genuinely distracting.
Know your camera’s ceiling by testing it — shoot the same scene at increasing ISO values and see where the noise starts bothering you.
Quick Reference: Exposure Settings by Scenario
| Scenario | Aperture | Shutter Speed | ISO |
|---|---|---|---|
| Standard portrait | f/1.4 – f/4 (ideally f/2.8) | 1/125 or 1/60 (with stabilisation) | As low as light allows, don’t fear 3200+ |
| Group portrait | f/4 – f/5.6 | 1/125 or 1/60 | As low as light allows, don’t fear 3200+ |
| Landscape / street | f/8 – f/13 | Depends on stability (tripod = slower is fine) | Keep as low as possible for max detail |
| Fast-moving subjects | Context-dependent | 1/1000 – 1/4000 | Bump freely to maintain shutter speed |
Photography is About Compromises
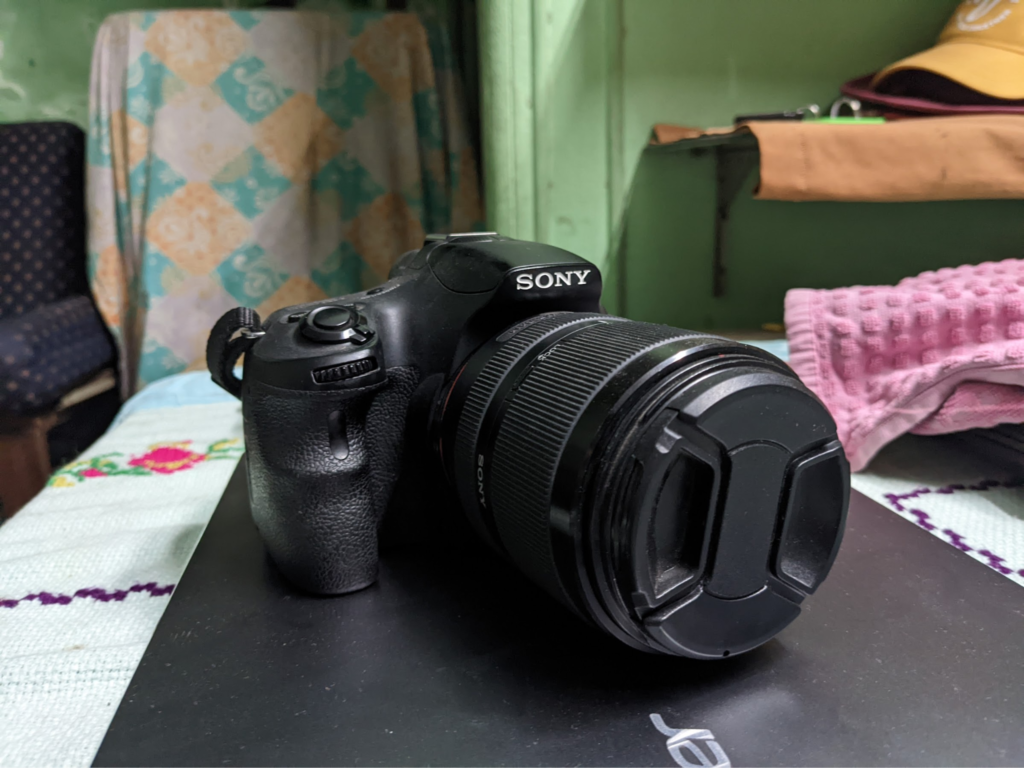
As I wrap this up, I’m reminded of the days when I picked up my first camera. It was the Sony A57 DSLR with the kit lens, and I always remember being bummed out about the kind of photos I’d take and blaming it on the gear.
Perhaps I was too harsh on the gear, and I wish I had had someone explain to me how things worked. Albeit, I figured it out eventually.
And that is important. Showing up for your hobby, trying to figure out things on your own. And that requires taking thousands of pictures.
The quote “I fear a man who has practised the same move a 1000 times” feels apt in this context. So go out there, explore, take a million shots. And if even one of your images is worth showcasing on your portfolio, you’ve achieved your mission.
And it’s also important to remember that even after going through the painstaking process of exposing your pictures well, your photos are always going to have nitpicks.
You’d wish you had gone a bit wider sometimes, or increased the shutter speed, or decreased your aperture. Photography is about compromises. It’s about going well beyond the capabilities of your gear and producing images that YOU are proud of.
And with that, we’ve reached the end of this article. If you want to see me apply these tips in real life, I’d appreciate it if you followed me on Instagram. Stay tuned to Shuttersociety for more such content.